James Bond Costume

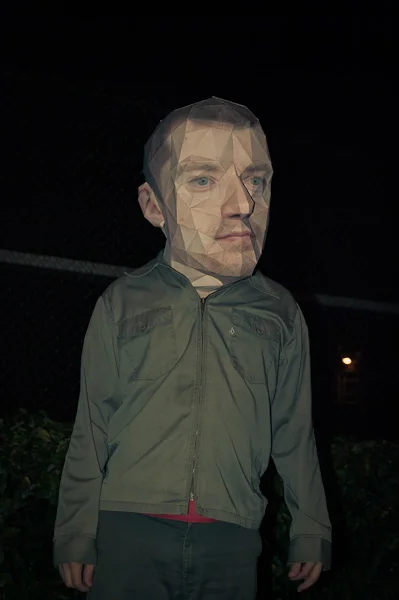
Low Poly Bond
A brief guide


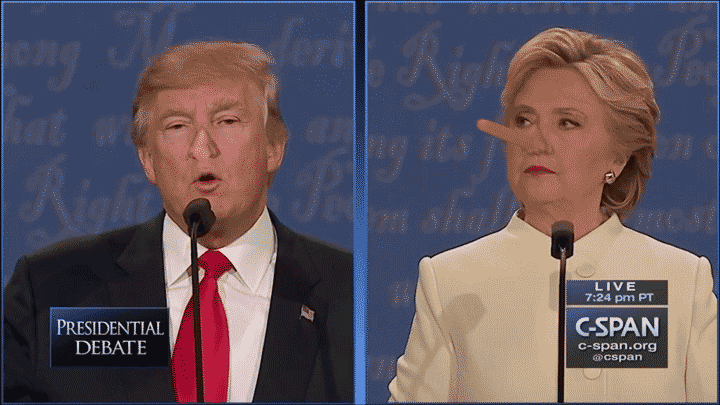
Halloween is a time of year that I look forward to and this costume is one that I have wanted to do in one form or another since I first saw these images in college.


At the time I didn't quite have the time or the technical know-how to pull off such a task but the seed was definitely planted. This year, I found myself with enough freetime to put into this project. No joke this required quite a bit of effort (12HRS a head roughly), but I'll share my files along with guides that I used at the bottom for anyone else who would like to give it a go.
My first plan was to in fact do my own face using the same guide the folks as Tested used here. However, after some tests with Photoscan (which really is a remarkable piece of software, I am looking forward to doing more future tests), and my own face I quickly found 2 things.

This software can certainly do a lot with a little.

Too many polygons and too much of me.
1. I did not want to stare at my ugly mug for the amount of time it would take me to put together.
2. The amount of polygons I would ultimately be working with is too damn high, and reducing them would extend the amount of work I needed to do further.
I thankfully found a guide that both eliminated me having to stare at my face as well as simplified things. At this point, I would encourage you to set the mood with the following music as you continue onward.
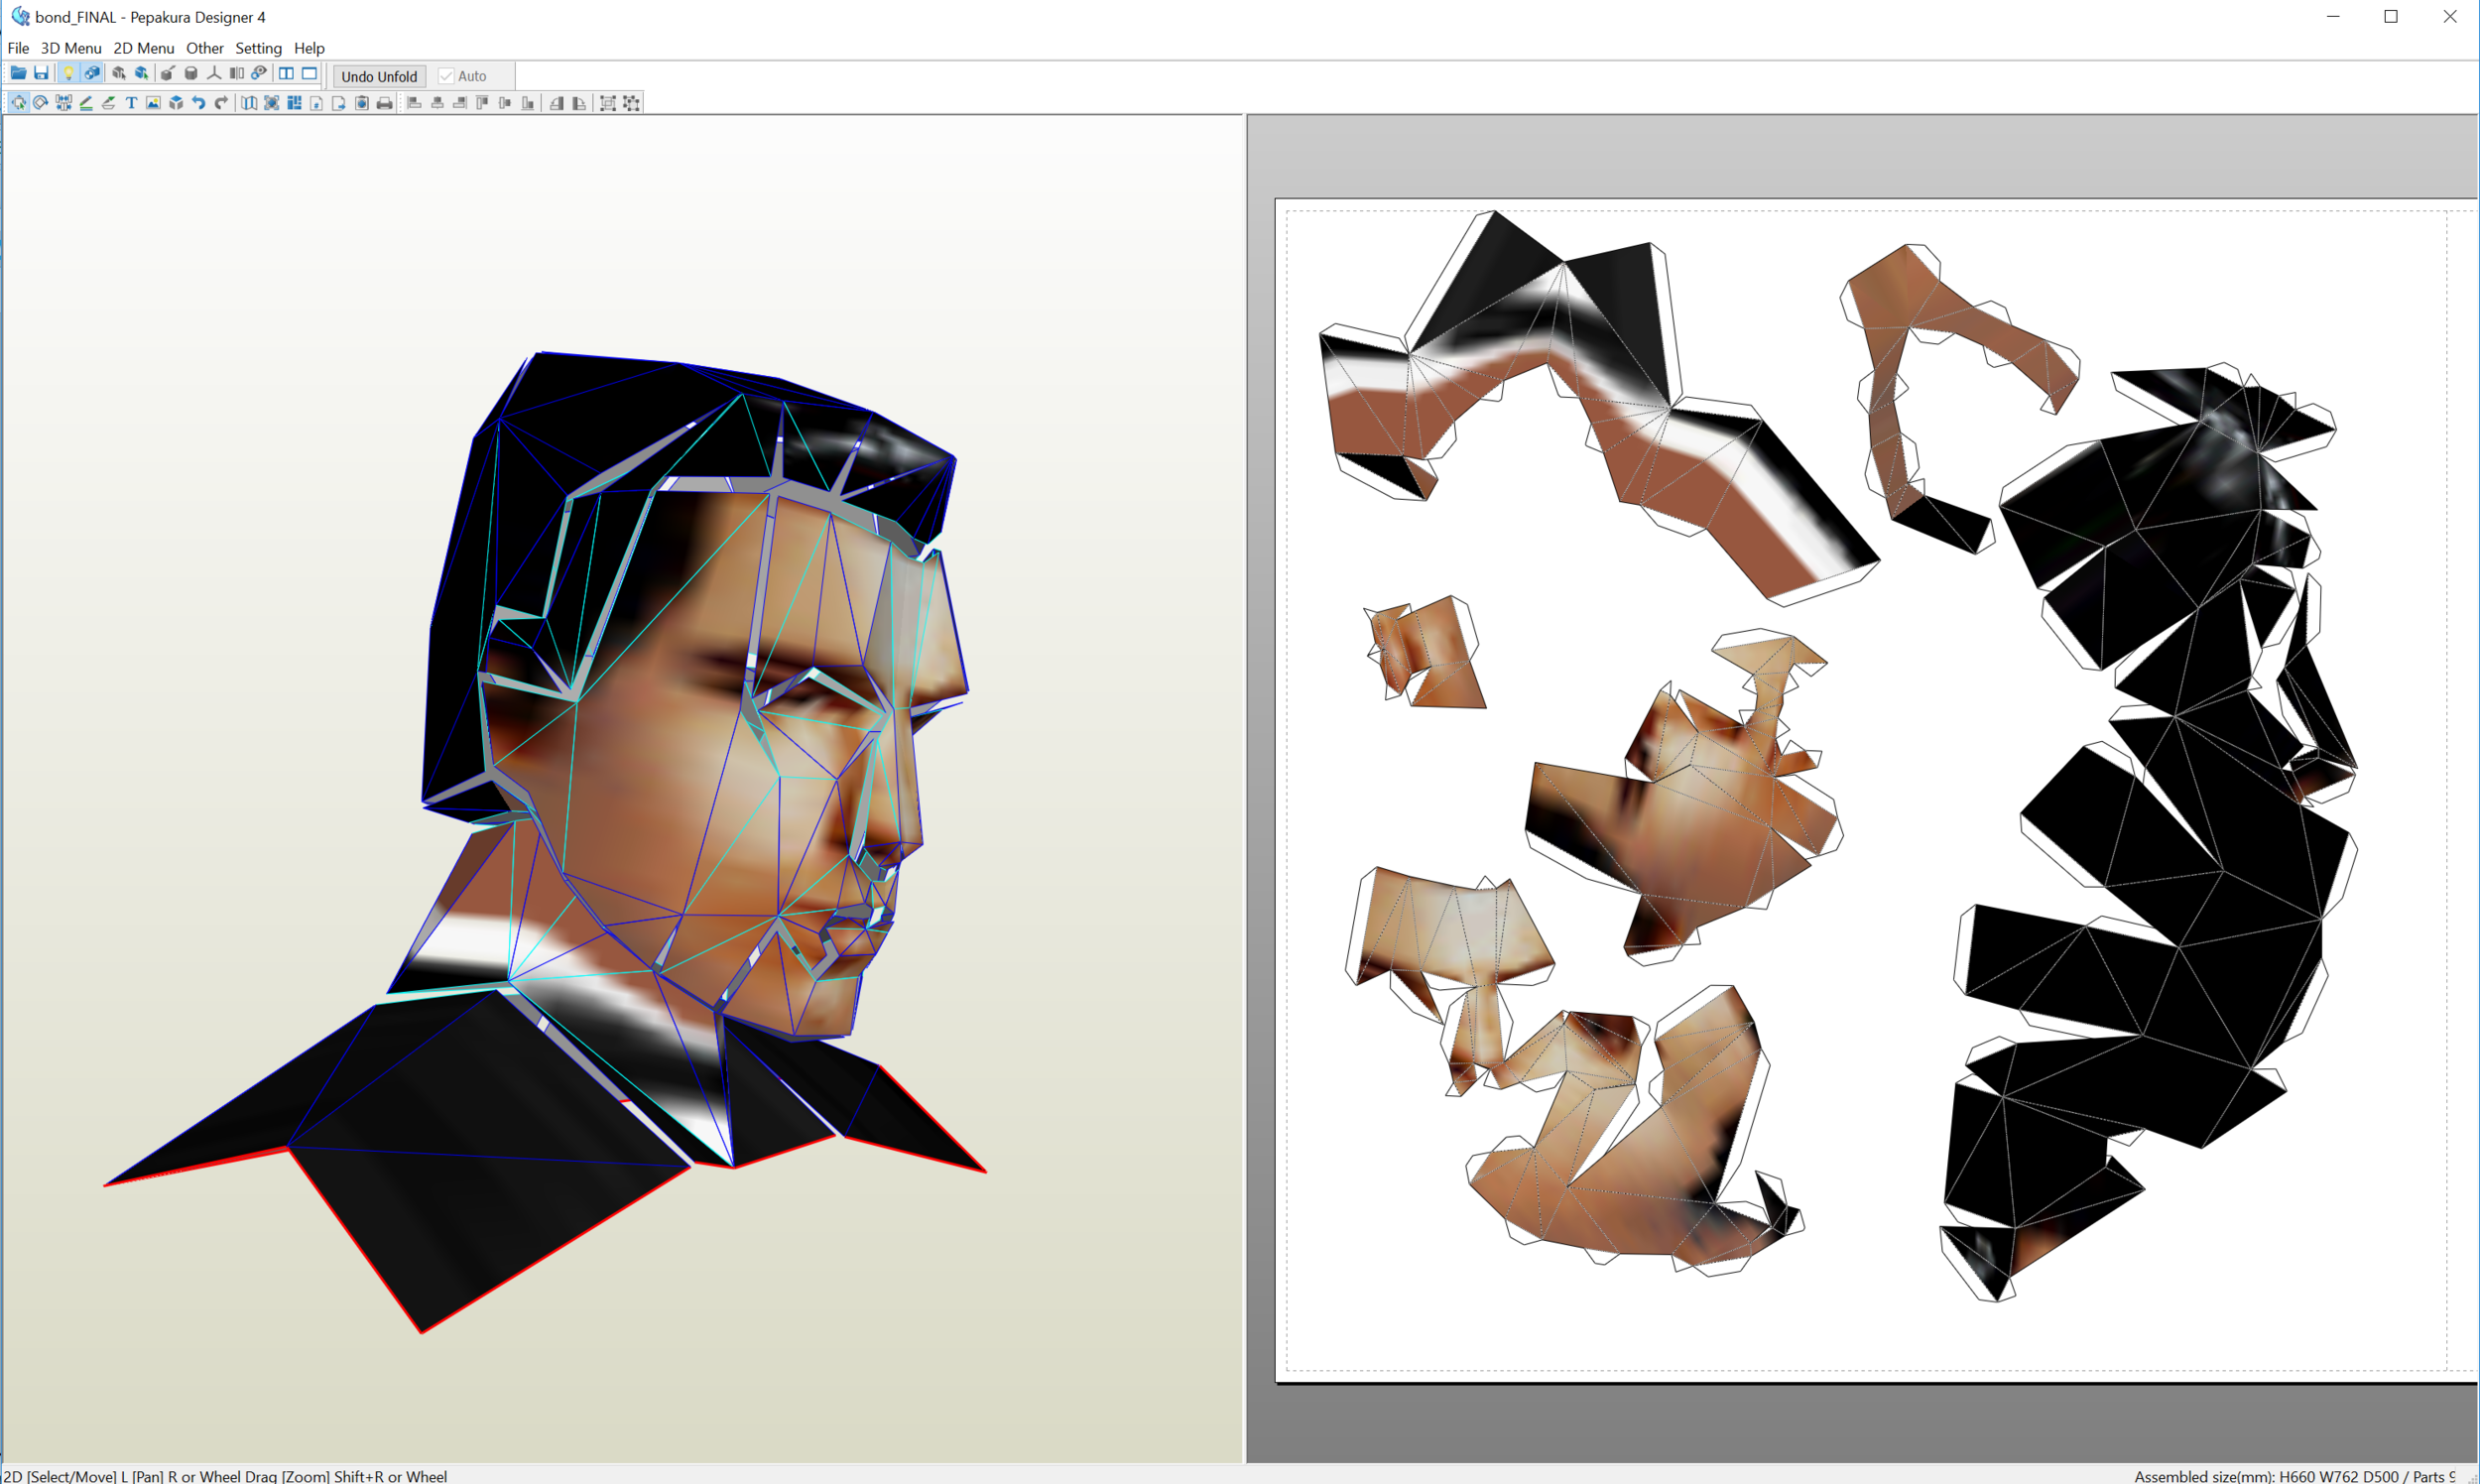
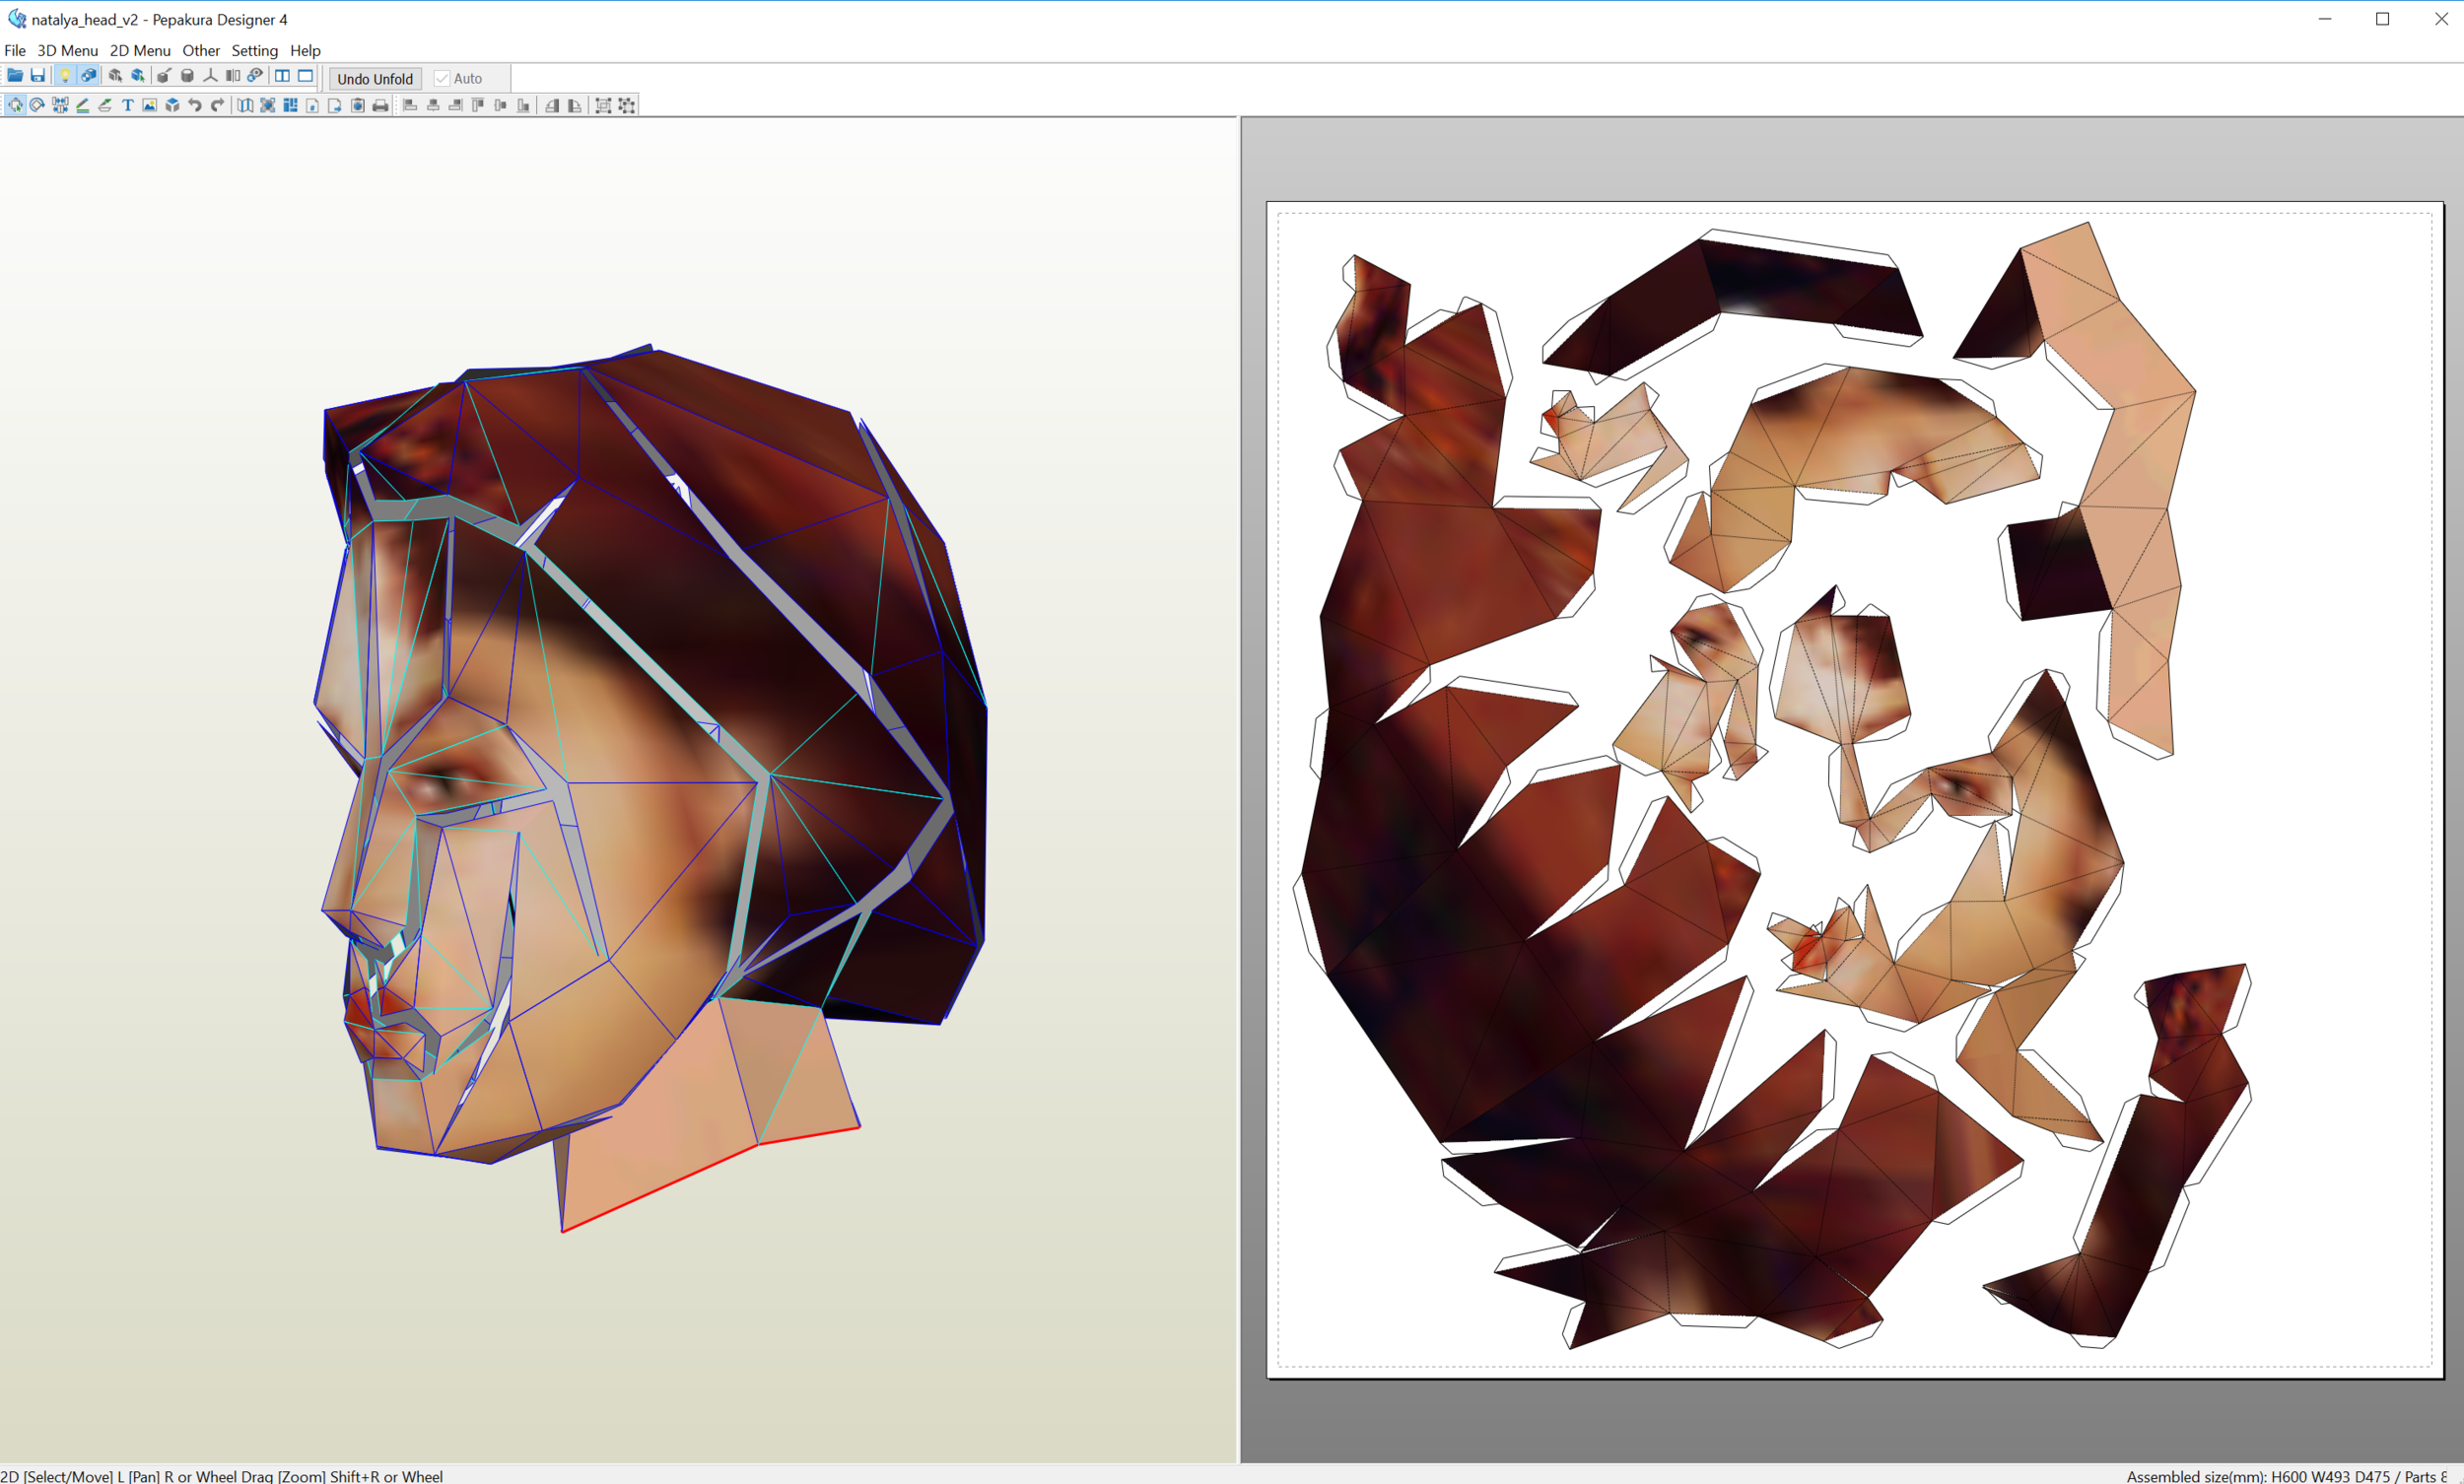
The first thing I had to do was get the actual geometry from the game. I knew that my best shot was getting it from an emulator, which is what the author of this guide did. Using the emulator and the script found in that guide I was able to export both Natalia's and Bond's geometry.


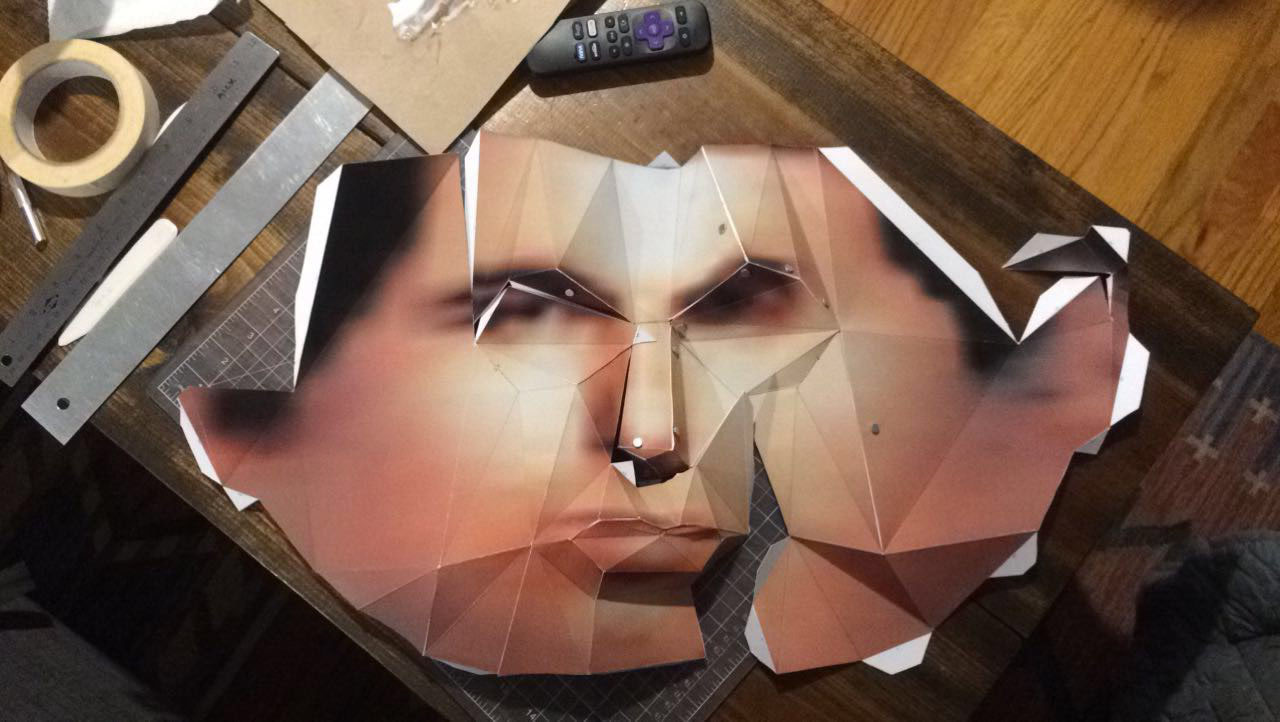
After I cleaned up the polygons a bit it was time to bring it into Pepakura. It took an hour or two to adjust to the interface and google how to do things like adjust tabs and scale the heads but for the most part it was incredibly easy to lay out the heads in a format that worked for my printer. I wanted as few pieces as possible to minimize the number of cuts with an x-acto that I would eventually need to make.
Putting it all together
At this point, it is simply a matter of printing, cutting, scoring, and gluing the whole thing together. I would recommend giving yourself several days to do this so that you can work for a bit and walk away to allow things to dry and solidify a bit. My wife, Alex Mata, was critical at this stage as she is far better at crafting and understanding how to best cut, fold, and glue everything together. These heads would be far uglier and seams more apparent without her advice and help. As recommended by the Tested Guide we got the tiny magnets to hold the tabs together while we continued to work around them. I don't know what I would have done without those suckers.
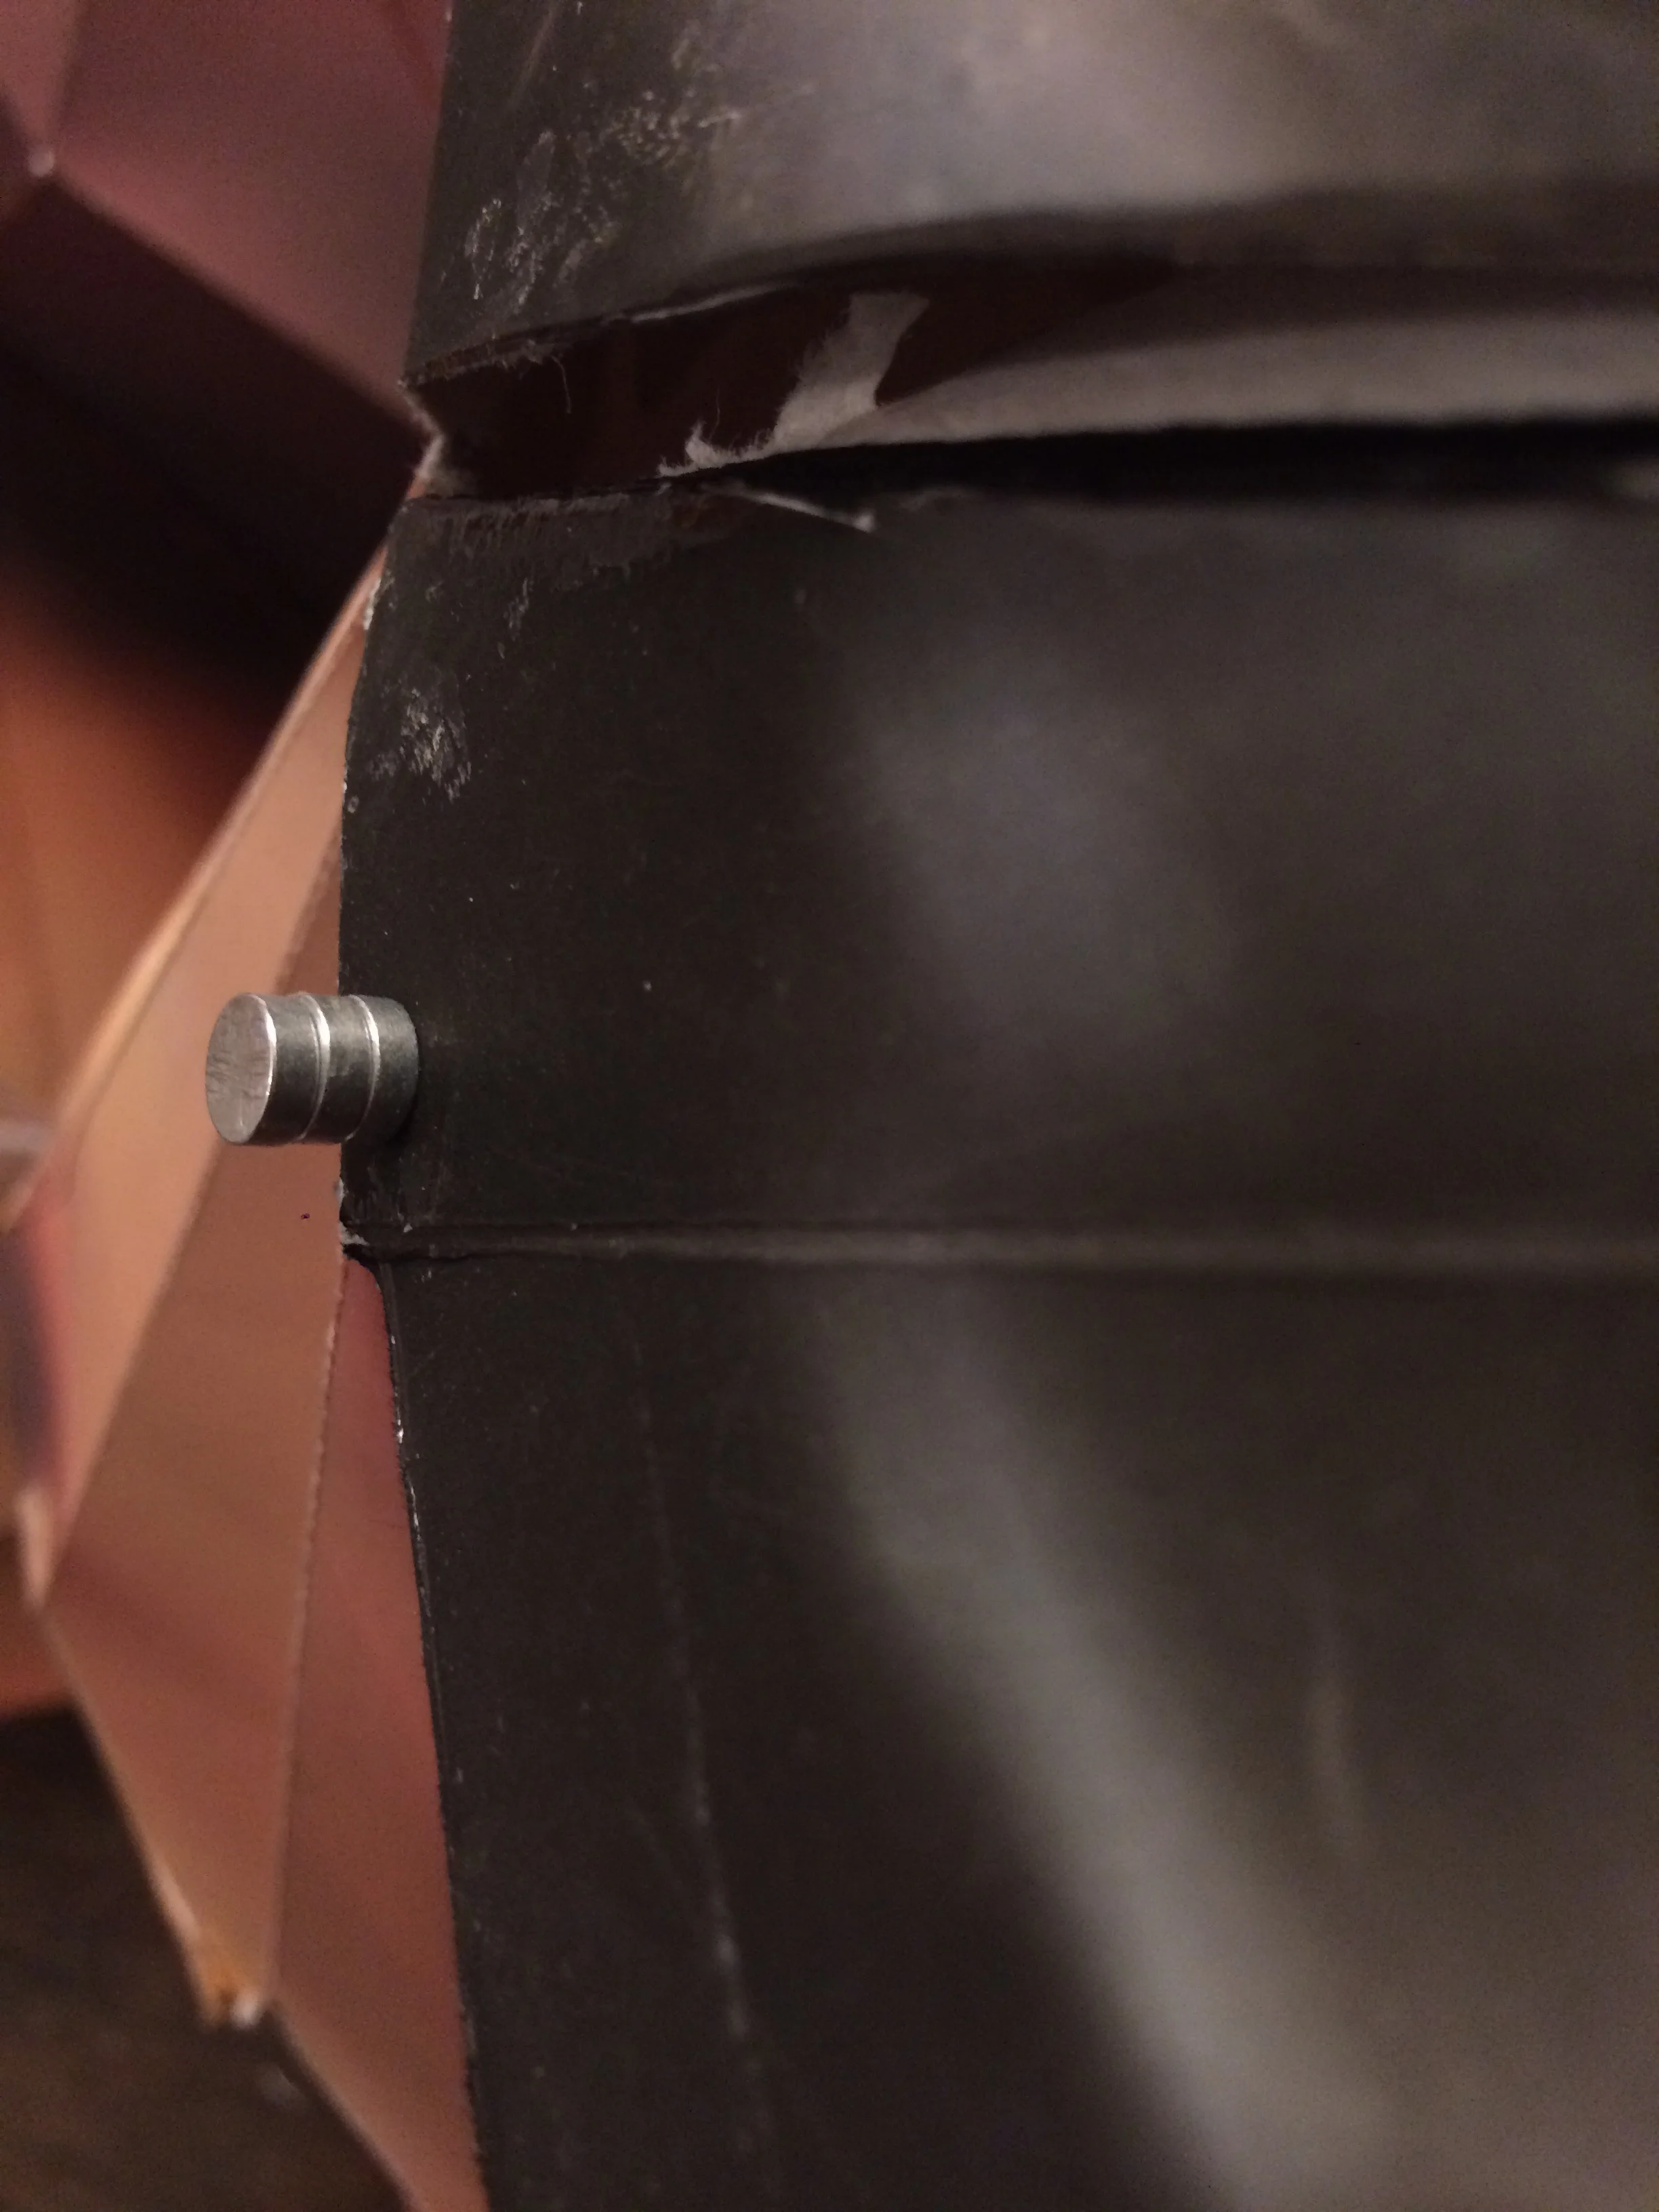
Seriously, use these guys.
So once you've pieced it all together you are finally free to hit the town. I will warn you that you cannot see shit in these. My wife cut very, very small eyeholes in her but in the darkness of the party they are pretty much worthless. Thankfully since they were mostly paper, glue and tape the it's pretty easy to get on and off.
You can download Pepakura and .C4D and PDF files I used to print below.